Federation 2 quickstart
Part 2 - Composition in Apollo Studio
Now that our project and tools are set up, we can start composing our supergraph schema with Apollo Studio.
Managed federation concepts
By composing our supergraph schema with Studio, we use a feature called managed federation. With managed federation, each of our subgraphs registers its schema with Apollo. Whenever a subgraph schema changes, Apollo composes a new supergraph schema.
Whenever composition succeeds, Apollo pushes an updated supergraph schema to the uplink, a special endpoint that gateways use to fetch their configuration:
Meanwhile, our gateway regularly polls the uplink for changes to its supergraph schema:
Whenever an update is available, the gateway downloads it and automatically begins using the new supergraph schema, without requiring a restart.
We strongly recommended managed federation for reducing downtime in your production supergraph. Let's set it up!
1. Register your subgraph schemas
Let's return to our gateway project. We can now use Rover's subgraph publish command to register our subgraph schemas with Apollo.
Run the following from your project directory, substituting your Studio graph's graph ref where indicated:
rover subgraph publish ➡️YOUR_GRAPH_REF⬅️ \--routing-url https://rover.apollo.dev/quickstart/products/graphql \--schema ./products.graphql \--name products \--convert

The --convert option converts your Studio graph into a federated graph. You only need to provide this option once for a given Studio graph.
If the command is successful, you'll see output like the following:
A new subgraph called 'products' for the 'docs-example-graph' graph was createdThe gateway for the 'docs-example-graph' graph was updated with a new schema, composed from the updated 'products' subgraph
Nice! If you open your graph's details in Studio now, you'll see types and fields from our products subgraph listed in the Schema tab:

Now, let's do the same thing for our reviews subgraph, again substituting your graph ref where indicated:
rover subgraph publish ➡️YOUR_GRAPH_REF⬅️ \--routing-url https://rover.apollo.dev/quickstart/reviews/graphql \--schema ./reviews.graphql \--name reviews
If you refresh the Schema tab in Studio, you'll now see types and fields from our reviews service as well.
Now that we've published our subgraph schemas, Apollo Studio automatically composes them into a supergraph schema! However, our gateway doesn't know how to fetch that schema from Apollo. We'll tackle that soon.
2. Enable Federation 2 support
To try out managed federation with the Federation 2 preview, you set your graph's federation version in Apollo Studio.
Open your graph's Settings page and find the Manage Variants section:
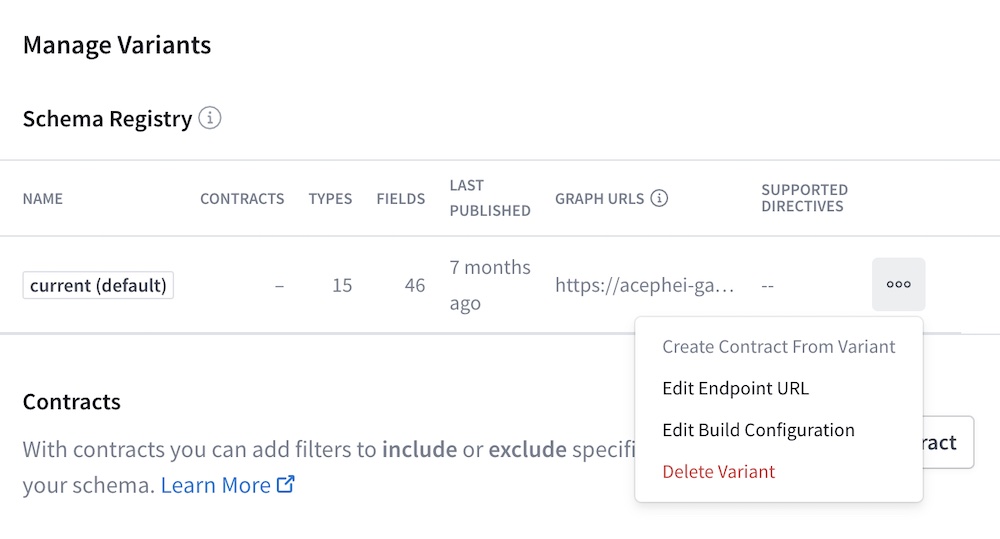
Click Edit Build Configuration for the variant you want to move to Federation 2. The following dialog appears:
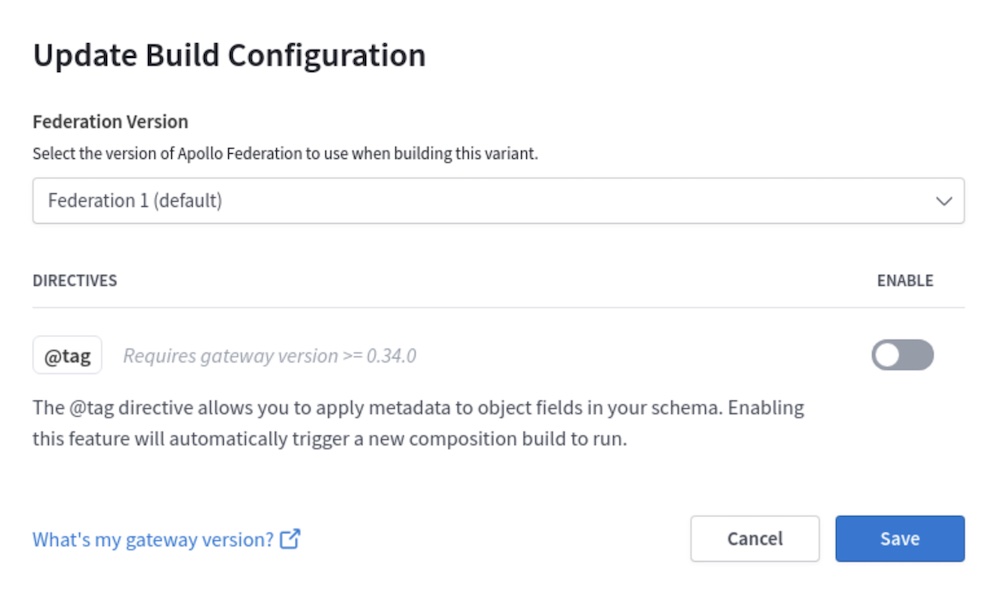
In the Federation Version dropdown, select Federation 2 and click Save.
Studio automatically begins composing your supergraph schema using Federation 2 composition logic. You can switch this back at any time.
3. Authenticate the gateway with Apollo Studio
It's time to enable our gateway to fetch its supergraph schema from Apollo! To do that, we'll need a graph API key that we set as the value of an environment variable.
API keys are secret credentials. Never share them outside your organization or commit them to version control. Delete and replace API keys that you believe are compromised.
Obtain a graph API key for your Studio graph by following these steps. Copy its value.
If you have an Enterprise plan, set the API key's role to
Contributor.Create a new file named
.envin your Node.js project folder.- Do not add the
.envfile to version control. If you're working in a Git repository, add.envto your.gitignorefile.
- Do not add the
Paste the following into
.env:APOLLO_KEY=your-api-keyAPOLLO_GRAPH_REF=your-graph-id@your-variant- Replace
your-api-keywith your graph API key. - Replace
your-graph-id@your-variantwith your graph's graph ref. (For details on graph refs, see Step 1.)
- Replace
Add the
dotenvNode.js library to your project:npm install dotenvThis library takes care of reading environment variable values from your
.envfile.Add the following line to the very top of
index.js:require('dotenv').config()Start up your gateway with
node index.js. This time there's no error, and you'll see output similar to the following:Apollo usage reporting starting! See your graph at https://studio.apollographql.com/graph/docs-example-graph@current/🚀 Gateway ready at http://localhost:4000/
By providing an API key to your gateway, you also automatically enable federated trace reporting to Apollo Studio, enabling you to view helpful performance metrics. Learn more about federated traces.
We can quickly open our browser to studio.apollographql.com/sandbox to explore our composed schema in Apollo Sandbox:
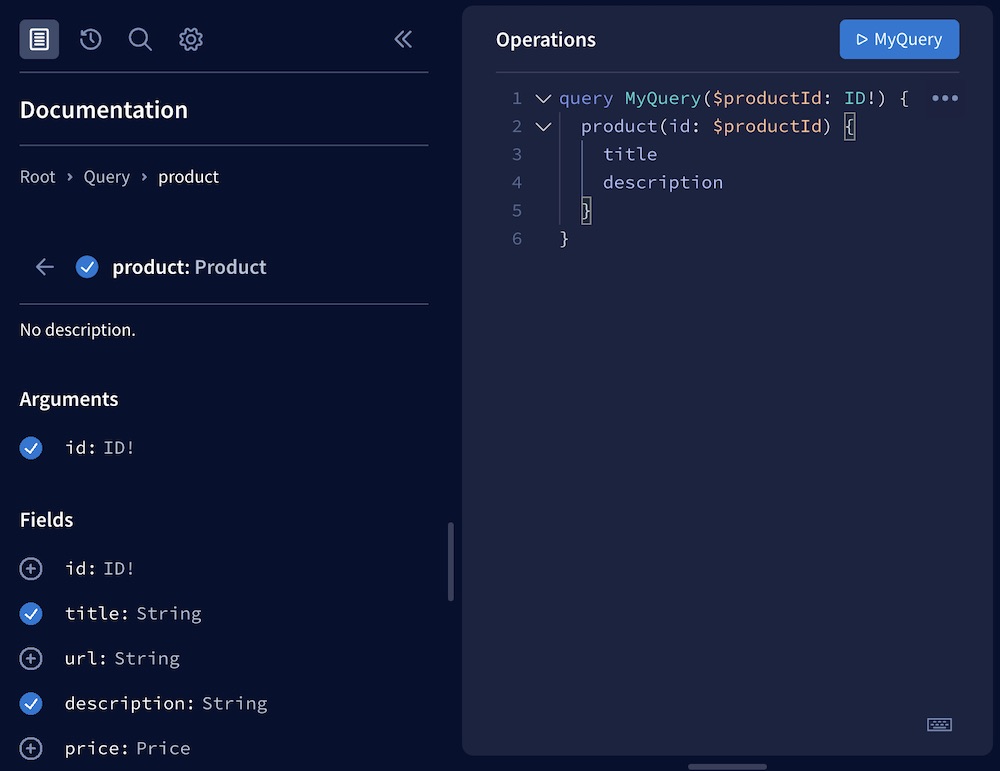
While we're here, you can even execute some test queries against the supergraph.
Moving forward
Nice work! We've registered two subgraph schemas with Apollo, and we have a federated gateway that then fetches the composed supergraph schema.
If we were now to register changes to one of our subgraph schemas, our running gateway would automatically fetch the corresponding changes to the supergraph schema.
Next, let's look at how to use the Rover CLI to compose a supergraph schema locally or in a CI environment. Go to part 3.